March 27, 2013

There's no such thing as bad publicity.

In CAD lessons at college, I had to create a poster for my end of year Fashion Show. 
I had to create this using techniques on CAD and my own skills.

I used Illustrator to draw around a figure to create the outline and then copy and pasted it and changed the line colour. I then added text in different fonts and colours to add the information about the show.

Here is my poster...


What do you think? 
Can you use CAD?
How do you use CAD?

XOXO

Confusion is being lost in a world you thought you knew.

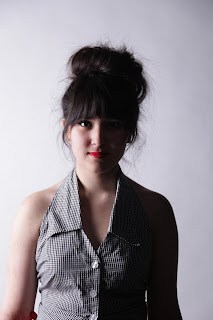
So for my 'Look book' I wanted to create the feeling of confusion. 
The feeling that you are lost in a world you didn't know.
As if your mind was blank, coloured walls.
But you felt happy.

*During the shoot for this my model got a little uncomfortable with modelling.
I had to then step in as we had no one else to do so.*

For my blanked minded images I tried doing coloured backgrounds, to convey the confusion in colour. 
I wanted her to feel like she was from the fifties but was lost in this colourful, mirage of walls and a life so different to her own. 

But I also wanted it to look like a classic, typical look book of simple images, with a clear shot of the model and outfit, but so the outfit and colours of the clothes contrasted or clashed with the background colours. 

Here are my images...


What do you think?

XOXO

March 14, 2013

Outfit Two: Patterning.

This is my second final design.
This is the design I've decided to toile for.
I toiled the top/bustier.

I began my toile by tracing out the fitted bodice block, in a size 12. 

This is the beginning of my patterning.

I began my toile by widening the top dart of the front bodice. 
I then drew the rounded shape for the bust section. 

This is the patterning for the back bodice. 

I measured the side of the front bodice to match the back and then I drew a line down to the centre back. I made this half of the side seam length. 

The start of my bustier cup. 

I drew off the cup for my bustier and then decided to change my way of patterning and to reduce the sewing amount.

My new bustier pattern.

Instead of having two darts in the cups I decided the take these out and create one centre seam.

My front bodice adaptation.

For the front I traced the rest of the bodice off and closed the dart.

My final front pattern. 
My back bodice adaptation.

For the back I did the same as on the front and traced it off and closed the dart.

My completed back pattern. 
My final patterns!!
The neck pattern.

I measured around the neck of the mannequin and added an extra 4/5cm for the hook and eyes.
I doubled it as it will be folded like bias binding when sewn. 

So this is the patterning for my bustier.

What do you think?

XOXO


March 06, 2013

Turning inspiration into something...

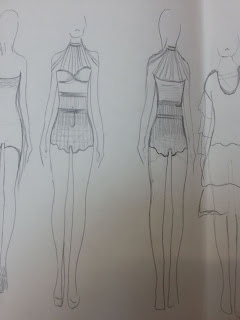
So from my research and inspiration, the modelling on the stand and my shape development I began to draw up designs and ideas.
Here is what I have so far...

I love all of these designs. I think these work really well as an unmatched collection.


I really dislike most of these designs. I think this sheet is my worst so far.


I really like the low open back of the first design on this sheet.
I used the halter neck neckline of the 50's. 

This sheet of designs is my favourite especially the one circled number one.
I like the pattern on the skirt, the shape of the skirt and the hem line. I also like the sharper, box-like lines of the shirt as it contrasts with the flowing, circular shapes of the skirt.

This is a selection of my designs inspired by the 50's with details taken from my Hippie research.

What do you think?

XOXO

Hanging around.

Sorry in advance for the skip from 60's to 50's and back again but here is some modelling on the stand I did for my 60's inspired work.

When looking at images from the 60's and the Hippie era many of the garments and trends had fringing and tassels and so I used these to drape on the stand and get some inspiration.

I created a strip of fringing from a piece of calico by cutting up to about 1cm from the edge and then placed it on the Mannequin to created different shapes and features.
Here is my outcome...


I really dislike this outcome as it looks unflattering and unprofessional. 


I really like this out come and this inspires in many ways that I will show in my design work.

I also think this draping works well, and I like the position. 
I really like tassels and fringing, I think it is we festival-like and looks great however it is created. Eg. Ripping fabric, cutting fabric, sewing rows of string/wool, etc...

Do you like fringing?
What do you think of my draping?

XOXO

All tied up!

While looking into the 50's I began getting ideas for my own garments, this then led to modelling on the stand. This is what I got from my ideas and research...


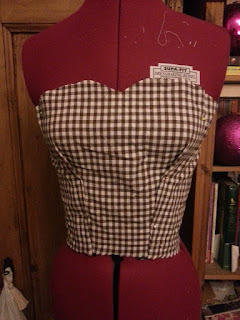
The images above are of my modelling on the stand. 
I was creating a sweet heart neckline with a fitted bodice.
I think this worked out well although it was a little miss shaped around the bust. I prefer the more bustier like tops. 


I am really proud of the outcome of tying the fabric around the bust to create a crop top. 
I like bows and this also worked with my 50's theme.


I used Ric-Rac in the images above to create the outline of the bust.
I used Ric-Rac because some of my research reminded me of this and it was a common trim in the 50's.

What do you think?

I really like Ric-Rac, do you?

XOXO

Pretty little girls in pretty little skirts.

This skirt is my little sisters but I really want one!
My friend Jenny (her blog is here) really wanted to wear it so while she had it on I took a few pictures.
This is just like the petticoats from the 50's dresses and skirts.

My aunt bought this petticoat/skirt for my sister a few years ago for Christmas and I have been jealous ever since! When I started looking into the 50's inspired dresses and skirts it came in very useful for inspiration and the shape of garments.

What do you think?

Do you know where you can buy these?

XOXO

Someone graffitied my bus!

HIPPIES CONTINUED...

I drew this image of an old school in a psychedelic style.
I used the shapes to create the outline of the bus. 

I love the colours, shapes and designs of the old school, buses. 
I got lots of inspiration for cut outs, prints and features for garments.

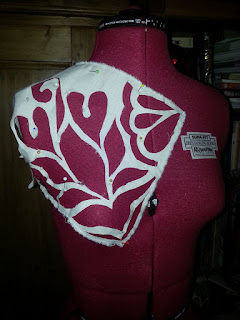
Here is what I did using my inspiration...


For these images and modelling on the stand I used the shapes from the bus I drew to cut out shapes from a piece of Calico! The pieces I cut from the Calico I then used to do even more modelling on the stand but these didn't give me much inspiration where as the cut out sheet of fabric gave me so many ideas for designs and features.

What do you think?
Do you model on the stand?

XOXO