Ooo... How exciting, the final dress post is here!
I firstly lay out my fabric and patterns and cut them out of my satin backed crepe.
I then created my patterns for my interfacing. I did this by drawing a 4cm line from my neck line down, on both front and back pattern pieces.
I pinned this to my light weight interfacing and cut it out, I then carefully Ironed it to the wrong side of my dress to stop my neck line from stretching due to it being cut on the fold.
This is my interfacing ironed on to my dress.
I then inserted my darts into my front dress piece.
My invisible zip is now inserted.
I then sewed with 1cm SA down from the zip to the bottom of the zip, I unpicked this about 3 times as I kept getting it caught on the bottom of the zip! Not fun at all!
I then sewed my shoulder with a 1cm SA!
This also shows a better picture of my darts.
My sleeve was then attached just like in my toile, this is such a pain to get right, although I think I did rather well, wouldn't you think?
I sewed down my sleeve and side seam with a 1cm SA, it then looked like this. ^^
A close up view of my under arm seam.
My final dress shell!!
The sleeve hanging outwards.
My zip opened.
My zip closed.
The back of my dress shell.
Lining of my final dress...
The difficult bit about the lining was working out which way to sew it as it has to be opposite to the dress shell.
My pattern pieces were lay onto the fabric and cut out separately so as to not mess it up like I did the first time on my satiny lining!
My sleeve ready to be cut out.
My lining interfacings.
The interfacing ironed on to the back.
The interfacing ironed onto the front.
I sewed in my darts.
My opposite dart.
So I can fit my lining to my zip I had to measure how far down the zip went just like my toile and sew down from there. I did this on the wrong side so I sewed to the top and redid it on the right side of the dress.
I sewed in my shoulder with a 1cm SA.
The inside seam of my shoulder.
I then did the difficult bit of my dress, attaching the sleeve! I had to unpick a few sections of this, this time! But thankfully it worked and looks better now I re-sewed bits.
A close up view of the sleeve seam.
The attached sleeve on my shoulder! Ha!
A close up of the shoulder on the outside.
Then with 1cm SA I sewed the sleeve as I had already done the side due to marking the zip on the wrong side.
A close up of the underarm seam.
The seam with the zip gap.
A close up of the side seam on the good side.
My lining completed.
What do you think so far?
Fitting the lining to the dress... Trust me this isn't too difficult...
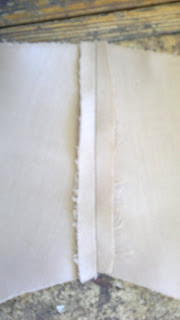
I turned my dress inside out with the lining on the out side. I the pinned the lining to the zip tape like above. (Apologies for the bad images.)
Sew as close to the teeth as possible without getting the thread caught.
I then pinned the neck line, making sure my side seams matched up on the lining and shell.
I sewed this with a 1cm SA.
My finished neck line seam.
My garment turned the right way around and my open zip, works wonders.
My closed zip.
I will add the hem, top stitch and final completed dress in the next couple of days, sorry for the delay.
What do you think?
XOXO


